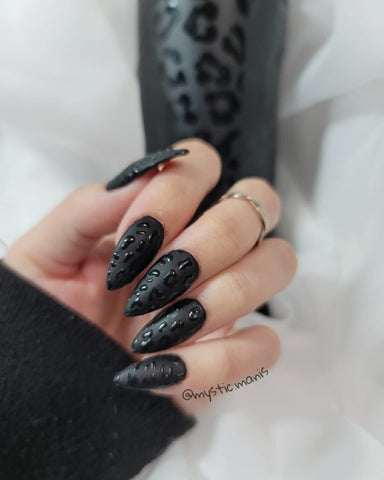
How to Get Matte Nails with Dip Powder
Written By: Dana L.
Fall is right around the corner, and I’m sure you’re having a hard time deciding which dip powder manicure is the best transition into the season. You’re probably finding yourself stuck between different colors, shapes, and designs. When in doubt I say go with a matte look. Cozy, sweater weather is almost here and matte is the perfect way to compliment your fall wardrobe. I’m here to help you with some tips on how to get that matte look you’ve been dying to have. At Revel Nail, any of our dips can be made into matte! Isn’t this amazing? So, grab your favorite Dip shade and let’s get started.
Good news, there are two different options you can choose from.
Option 1: Buff your way to matte
What you’ll need:
Dip Powder, liquids (Pro Base, Activator, and Finish Gel), brilliant buffer block
Steps:
If you don’t have a UV or LED light then, this option will be best for you and it’s super simple!
Step 1: Apply a thin layer of Pro Base from the base to the tip of your nails. Dip nail in the Revel Nail dip powder shade of choice.
Step 2: Repeat step 1 again. We recommend doing 2 dips but you can do more if you would like.
Step 3: Next, apply Activator onto the nail making sure to cover the edges and capping the tips. Allow your nails to dry for some time. You will then apply another coat of Activator and wait 1 minute. After you will wipe your nails with a line-free wipe or a paper towel to ensure the Activator is fully dried or optimal shine!
Step 4: Now, it’s time for the Finish Gel. It’s important to only do a quick 1-2 strokes on your first coat, it is going to dry funny but trust the process! Oh, and make sure to wipe your brush on a lint free surface, like a paper towel to ensure not Activator gets into your Finish Gel. Apply a second coat but this time you need to be more detailed, don’t forget to cap the edges. Now wait 1-2 minutes for the Finish Gel to dry completely.
If you’re thinking this sounds a little familiar you’re right! All you have to do is complete the same steps you would normally do with a small change at the end.
Step 5: To get matte you will buff off the shine and then apply Activator. It’s very important that Finish Gel is applied to seal the manicure for optimal longevity.
Option 2: Matte Gel Top Coat
What you’ll need:
Dip Powder, liquids (Pro Base, Activator, and Matte Gel Top Coat), UV or LED light
Steps:
If you have a UV or LED light, then this option will be the best fit for you.
Step 1: Follow the same steps as you normally would but skipping the second coat of Activator.
Step 2: Instead of using the Finish Gel you will apply a thin coat of Matte Gel Top Coat. It is important to make sure you properly buff the nail to “rough it” up so the Gel has something to stick to.
Step 3: Then, place your nails under a UV or LED light. For optimal curing (in 60 seconds) we suggest a 36/48 Watt lamp. If your lamp is lower wattage you will need to play around with curing times and may need to cure much longer.
Step 4: The last thing you need to do is wipe your nails with a lint paper towel soaked In alcohol.


